
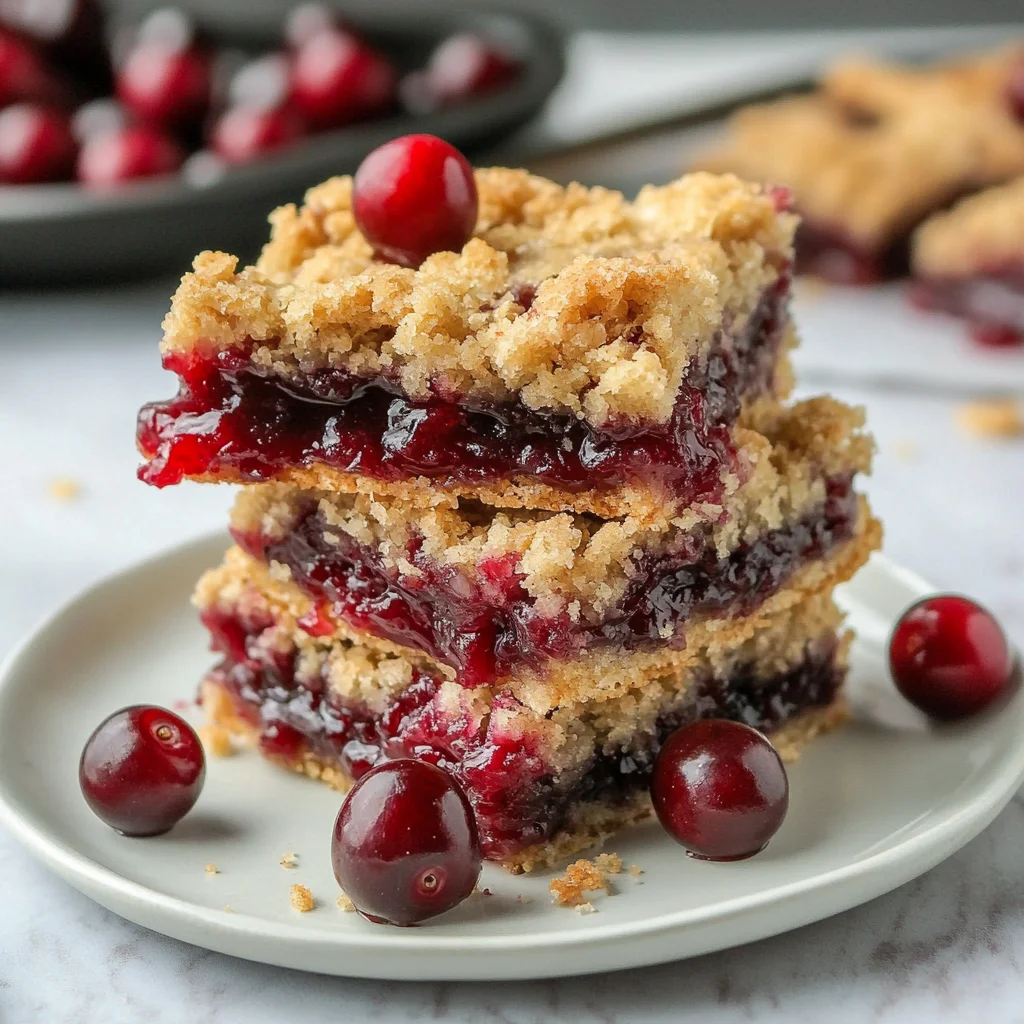
Imagine sinking your teeth into a warm cherry crumble bar, where the sweet-tart cherries burst with flavor beneath a golden, buttery oat topping that crumbles perfectly at every bite. The enticing aroma wafts through your kitchen, drawing everyone in like a siren’s call, promising an unforgettable dessert experience that’s just waiting to be devoured.
These cherry crumble bars hold a special place in my heart, reminding me of summer afternoons spent baking with my grandma as we created memories and delicious treats together. Perfect for picnics, family gatherings, or simply indulging on a cozy evening, these bars are bound to become a cherished favorite, leaving you craving more of their irresistible taste and texture.
Why Is Cherry Crumble Bars So Irresistibly Good?
Deliciously sweet and tart, these Cherry Crumble Bars are a delightful treat that everyone will love. Easy to make, with just 15 minutes of prep, they fit perfectly into any busy schedule. Buttery oat topping adds a rich texture that complements the juicy cherry filling beautifully. Versatile enough for any occasion, from family gatherings to cozy nights in, these bars are sure to impress!
Cherry Crumble Bars Ingredients
For the Crust and Topping
- 1 cup all-purpose flour – This provides the base for your bars, creating a tender yet sturdy crust.
- 1 cup old-fashioned oats – Adds a chewy texture and heartiness to the topping, making it extra satisfying.
- 1/2 cup brown sugar (packed) – Gives a rich, caramel-like sweetness that complements the tart cherries beautifully.
- 1/2 cup unsalted butter (melted) – Ensures a buttery flavor and helps bind the ingredients together perfectly.
- 1/4 teaspoon salt – Enhances all the flavors, balancing the sweetness of the brown sugar and cherries.
For the Cherry Filling
- 2 cups fresh or frozen cherries (pitted and halved) – The star of your Cherry Crumble Bars; they add vibrant color and tartness.
- 1/4 cup granulated sugar – Sweetens the cherry filling, making it irresistibly delicious alongside the crumbly topping.
- 1 tablespoon cornstarch – Acts as a thickening agent, keeping your filling from becoming too runny during baking.
- 1 tablespoon lemon juice – Brightens up the cherry flavor and adds a refreshing zing to your dessert.
How to Make Cherry Crumble Bars
1. Preheat the oven to 350°F (175°C). Grease your baking pan with a little butter or cooking spray to ensure easy removal later.
2. Combine flour, oats, brown sugar, melted butter, and salt in a mixing bowl. Mix until the texture is crumbly and inviting; this will be the base of your delicious crumble.
3. Press half of this mixture into the bottom of the prepared baking pan to form a solid crust. This step is crucial for holding all that cherry goodness!
For the Cherry Filling:
4. Mix cherries, granulated sugar, cornstarch, and lemon juice in another bowl until everything is well combined. The sweetness of the cherries will shine through beautifully.
5. Spread the cherry mixture evenly over your crust in the baking pan. Make sure every bite gets that wonderful cherry flavor!
6. Sprinkle the remaining crumble mixture over the cherry filling generously. This creates a delightful topping that will crisp up beautifully during baking.
7. Bake in the preheated oven for 30 minutes or until the top turns a lovely golden brown and your kitchen fills with mouthwatering aromas.
8. Cool completely before slicing into bars. This waiting time allows all those flavors to meld perfectly together.
Optional: Serve with a scoop of vanilla ice cream for an indulgent treat!
Exact quantities are listed in the recipe card below.
Tips for the Best Cherry Crumble Bars
- Use Fresh Cherries: If possible, opt for fresh cherries for a vibrant flavor. Frozen can work, but ensure they’re well-drained to avoid excess moisture.
- Measure Accurately: Pack the brown sugar tightly in your measuring cup. This helps create a rich, caramel-like sweetness in the crumble topping.
- Don’t Overmix: When combining the crust ingredients, mix just until crumbly. Overmixing can lead to a tough texture rather than a tender, buttery base.
- Cool Before Slicing: Allow the Cherry Crumble Bars to cool completely before cutting them. This helps them hold their shape and prevents a messy slice.
- Adjust Sweetness: Taste your cherry filling before baking; if your cherries are tart, you might want to add an extra tablespoon of sugar for balanced flavor.
- Check Your Oven: Every oven is different! Keep an eye on your bars during the last few minutes of baking to achieve that perfect golden top without overbaking.
How to Store and Freeze Cherry Crumble Bars

- Room Temperature: Keep your Cherry Crumble Bars in an airtight container for up to 3 days. Ensure they are completely cooled before sealing to maintain freshness.
- Fridge: For longer storage, place the bars in the refrigerator where they can last for up to a week. Cover them tightly with plastic wrap or a lid.
- Freezer: To enjoy your Cherry Crumble Bars later, freeze them for up to 3 months. Wrap individual bars in plastic wrap and then store in a freezer-safe bag.
- Reheating: When ready to indulge, simply thaw at room temperature or microwave for 15-20 seconds until warmed through. Enjoy!
Cherry Crumble Bars Your Way
Feel free to get creative with this delightful recipe and make it uniquely yours!
- Gluten-Free: Substitute all-purpose flour with a gluten-free blend, ensuring you can enjoy these bars without worry. You’ll still achieve that lovely crumbly texture, perfect for a gluten-free treat.
- Nutty Twist: Add 1/2 cup of finely chopped nuts like almonds or walnuts to the oat mixture for a delightful crunch. The added nuttiness complements the sweet cherries beautifully and gives each bite extra depth.
- Coconut Delight: Replace half of the oats with shredded coconut for a tropical twist. This adds a hint of sweetness and chewiness that pairs wonderfully with the tart cherries.
- Spiced Up: Incorporate 1 teaspoon of cinnamon or nutmeg into the dry ingredients for a warming spice note. These spices elevate the flavor profile and make your kitchen smell heavenly while baking.
- Vegan Option: Use coconut oil in place of butter and flaxseed meal mixed with water as an egg substitute. The result will be equally delicious, showcasing how versatile these bars can be!
- Berry Medley: Mix in other berries like raspberries or blueberries with the cherries for a vibrant fruit medley. Each bite will burst with flavor, creating a delightful mixture that’s both colorful and tasty.
- Zesty Lemon: Add an extra tablespoon of lemon juice to the cherry filling for an invigorating zing. This brightens up the overall flavor and balances out the sweetness perfectly.
Make Ahead Options
If you’re looking to save time while still enjoying the delightful taste of Cherry Crumble Bars, this recipe is perfect for meal prep. You can prepare the crust and topping by mixing together 1 cup all-purpose flour, 1 cup old-fashioned oats, 1/2 cup packed brown sugar, 1/2 cup melted unsalted butter, and 1/4 teaspoon salt. This mixture can be stored in the fridge for up to 3 days before baking. Additionally, the cherry filling made with 2 cups of pitted cherries, 1/4 cup granulated sugar, 1 tablespoon cornstarch, and 1 tablespoon lemon juice can also be prepped ahead and kept in an airtight container for up to 24 hours. When you’re ready to serve these scrumptious Cherry Crumble Bars, simply combine the prepared crust and filling, bake for about 30 minutes at 350°F (175°C), and enjoy a warm dessert that tastes freshly made!
Cherry Crumble Bars Recipe FAQs
What kind of cherries should I use for the filling?
You can use either fresh or frozen cherries for this recipe. If using frozen, there’s no need to thaw them beforehand; just pit and halve them straight from the freezer. Fresh cherries often have a brighter flavor, but frozen ones can be just as delicious, especially when they’re in season.
How do I store leftover cherry crumble bars?
Once cooled, store your cherry crumble bars in an airtight container at room temperature for up to 3 days. To keep them fresher longer, you can refrigerate them for about a week. Just make sure they’re completely cooled before sealing them up to prevent moisture buildup.
Can I freeze cherry crumble bars?
Absolutely! These bars freeze wonderfully. Once completely cooled, wrap them tightly in plastic wrap or aluminum foil and place them in a freezer-safe container. They’ll stay fresh for up to 3 months. When you’re ready to enjoy, simply thaw them in the refrigerator overnight or at room temperature for a few hours.
What if my crumble topping is too dry?
If your crumble topping seems too dry and crumbly, it may need a little more moisture. Consider adding an extra tablespoon of melted butter or a splash of water to help bind the mixture together. It should hold together nicely when pressed into the pan.
Is there a gluten-free option for this recipe?
Yes! You can easily make these cherry crumble bars gluten-free by substituting the all-purpose flour with a 1: 1 gluten-free baking blend. Additionally, ensure that your oats are certified gluten-free to avoid any cross-contamination.
What’s the serving size for this recipe?
This recipe yields about 4 generous servings, with each serving containing approximately 250 calories. However, feel free to cut smaller squares if you want to share these delightful treats during gatherings!