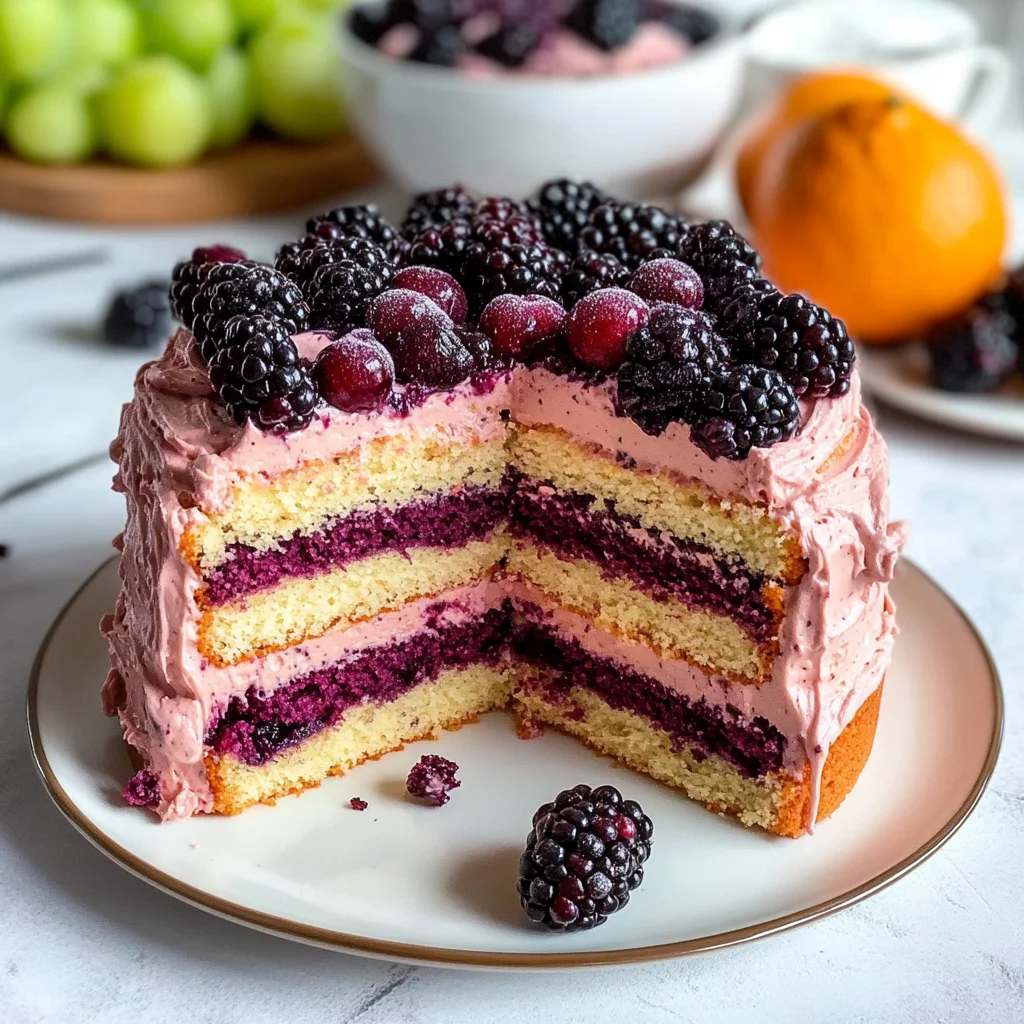
Imagine a slice of cake that dances on your palate, where the sweetness of ripe blackberries meets the zesty brightness of fresh oranges. The moment you take a bite of this Blackberry Orange Layer Cake, the flavors swirl together in a delightful harmony, teasing your taste buds with their vibrant and refreshing notes, while the moist texture makes each forkful feel like a soft embrace.
This cake isn’t just dessert; it’s an experience that transports you to sunlit picnics and joyful celebrations. I can still recall the laughter-filled afternoons spent baking this beauty with my grandmother, her infectious giggles blending with the citrusy aroma wafting through the kitchen. Perfect for birthdays, brunches, or any excuse to indulge, this delectable treat is guaranteed to leave you craving more with every bite!
Why Is Blackberry Orange Layer Cake So Irresistibly Good?
Delightful flavors combine with fresh blackberries and zesty orange, creating a cake that’s perfect for any occasion. Moist texture ensures each bite melts in your mouth, while the simple ingredients make it easy for bakers of all levels to whip up. Stunning presentation with vibrant berries on top makes it a showstopper at celebrations. Versatile dessert that pairs wonderfully with coffee or tea—perfect for brunch or an evening treat!
Blackberry Orange Layer Cake Ingredients
- For the Cake
- 2 cups all-purpose flour – Provides the structure for the layers, ensuring a light and fluffy texture.
- 1 cup granulated sugar – Sweetens the cake perfectly, balancing the tartness of the blackberries.
- 1 cup unsalted butter (softened) – Adds richness and moisture, making each bite decadently buttery.
- 4 large eggs – Essential for binding and creating a tender crumb in your Blackberry Orange Layer Cake.
- 1 cup buttermilk – Contributes to the cake’s moistness and enhances flavor with its slight tang.
- 1 tablespoon baking powder – Helps the cake rise beautifully, giving it that perfect lift.
- 1 teaspoon baking soda – Works with the buttermilk to create a soft and airy texture.
- 1 teaspoon salt – Enhances all the flavors and balances sweetness for a more complex taste.
- 1 tablespoon orange zest – Infuses a bright citrus flavor that complements the blackberries wonderfully.
- 1 cup fresh blackberries (plus extra for garnish) – Adds bursts of juicy flavor and vibrant color to each slice.
- For the Frosting
- 1 cup unsalted butter (softened) – Forms a creamy base that makes your frosting smooth and spreadable.
- 4 cups powdered sugar – Sweetens the frosting while keeping it light and fluffy, perfect for layering on your cake.
- 1 teaspoon vanilla extract – Adds depth of flavor, enhancing the overall sweetness of the frosting.
- 2 tablespoons heavy cream – Creates a rich texture that makes spreading easy and adds lusciousness to each bite.
- 1 tablespoon orange juice – Brightens up the frosting with citrus notes, tying back to the cake’s flavors beautifully.
Step-by-Step Blackberry Orange Layer Cake
1. Preheat the oven to 350°F (175°C). Prepare two 9-inch round cake pans by greasing and flouring them, ensuring your layers will slide out easily once baked.
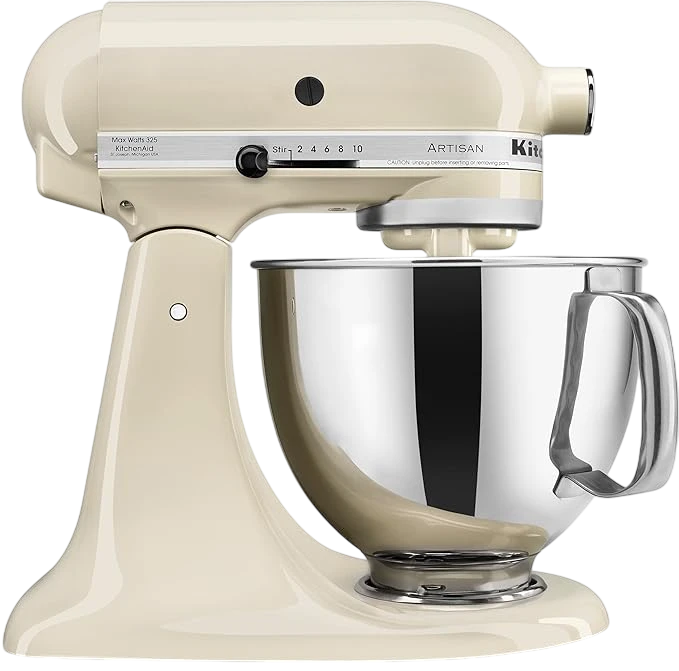
2. Cream together 1 cup of softened unsalted butter and 1 cup of granulated sugar in a mixing bowl. Beat until light and fluffy, which should take about 3-4 minutes for that perfect texture.
3. Add 4 large eggs one at a time, mixing well after each addition. Stir in 1 tablespoon of fresh orange zest to infuse your batter with bright citrus flavor.
4. Whisk together 2 cups of all-purpose flour, 1 tablespoon of baking powder, 1 teaspoon of baking soda, and 1 teaspoon of salt in another bowl. This dry mixture will provide the structure for your cake.
5. Combine the dry ingredients gradually with the wet mixture, alternating with 1 cup of buttermilk. Mix until just combined; don’t overdo it—this keeps your cake delightfully moist!
6. Fold in 1 cup of fresh blackberries gently, so they remain whole and burst with flavor in every slice of your Blackberry Orange Layer Cake.
7. Divide the batter evenly between the prepared pans and smooth the tops with a spatula to ensure an even bake for about 25-30 minutes.
8. Bake in the preheated oven until golden brown or until a toothpick inserted into the center comes out clean—a sure sign they’re ready!
9. Cool the cakes in their pans for about 10 minutes before transferring them to a cooling rack to cool completely; this helps maintain moisture.
For the Frosting:
10. Beat 1 cup of softened unsalted butter until creamy in a mixing bowl—this forms the base for your luscious frosting.
11. Add in 4 cups of powdered sugar gradually, mixing well until fully combined for that sweet and silky frosting consistency.
12. Incorporate 1 teaspoon of vanilla extract, along with 2 tablespoons of heavy cream and 1 tablespoon of orange juice. Beat until fluffy and smooth—about 2-3 minutes will do!
Assembling the Cake:
13. Layer one cake on a serving plate and spread a generous layer of frosting on top to create an irresistible filling.
14. Top with the second layer and frost both the top and sides generously, creating an invitingly frosted exterior that beckons to be sliced.
15. Garnish with additional blackberries and orange slices if desired; this adds a touch of elegance and freshness to your beautiful creation.
Optional: You can sprinkle some extra orange zest on top for added aroma!
Exact quantities are listed in the recipe card below.
Pro Tips for Blackberry Orange Layer Cake
- Room Temperature Ingredients: Ensure your butter and eggs are at room temperature for better emulsification, resulting in a moist and fluffy cake.
- Gentle Folding: When incorporating the blackberries, gently fold them into the batter to prevent them from breaking apart, which can lead to a soggy texture.
- Check for Doneness: Avoid overbaking by checking the cakes a few minutes early; a toothpick should come out clean but moist to ensure the Blackberry Orange Layer Cake stays tender.
- Cooling Time: Allowing the cakes to cool completely is crucial. If they’re too warm, the frosting can melt and slide off, ruining your beautiful layers.
- Frosting Consistency: If your frosting is too thick, add more heavy cream one tablespoon at a time until you reach the desired spreadable consistency.
How to Store and Freeze Blackberry Orange Layer Cake

- Room Temperature: Keep the cake covered at room temperature for up to 2 days to maintain moisture and flavor.
- Fridge: Store any leftover Blackberry Orange Layer Cake in the refrigerator for up to 5 days, wrapped tightly in plastic wrap or an airtight container.
- Freezer: For longer storage, freeze slices of the cake for up to 3 months. Wrap each slice individually in plastic wrap and place them in a freezer-safe bag.
- Reheating: When ready to enjoy, thaw at room temperature for about 1 hour or microwave for 10-15 seconds on low power.
Blackberry Orange Layer Cake Your Way
Feel free to get creative and make this delicious cake uniquely yours with these fun twists!
- Gluten-Free: Substitute all-purpose flour with a 1:1 gluten-free baking blend for a delightful, gluten-free treat. This swap allows everyone to enjoy the cake without sacrificing flavor or texture.
- Berry Medley: Replace blackberries with raspberries or blueberries for a colorful twist. Each berry brings its unique sweet and tangy notes, making it a vibrant centerpiece for any occasion.
- Citrus Infusion: Add lemon or lime zest along with the orange for an extra zing. This brightens the cake and creates a refreshing citrus explosion in every bite.
- Nutty Crunch: Fold in ½ cup of chopped walnuts or pecans into the batter for added texture. The nuts provide a delightful crunch that complements the moistness of the cake perfectly.
- Spiced Sensation: Incorporate 1 teaspoon of cinnamon or ginger into the batter for a warm, spiced flavor. This adds depth and warmth, making each slice feel like a cozy hug.
- Vegan Delight: Use flax eggs and coconut oil instead of eggs and butter for a plant-based version. The result is just as moist and flavorful, ensuring no one misses out on this treat!
- Lemon Cream Cheese Frosting: Swap out the buttercream for a tangy cream cheese frosting by mixing in cream cheese with the powdered sugar. This frosting option adds a creamy richness that pairs beautifully with the fruity layers.
Make Ahead Options
This delightful Blackberry Orange Layer Cake is perfect for meal prep, allowing you to enjoy its luscious flavors with minimal last-minute effort. You can prepare the cake layers up to 24 hours in advance; simply follow the steps to mix and bake as directed—grease and flour your pans, cream the softened butter and granulated sugar, beat in the eggs with orange zest, whisk together your dry ingredients, alternate adding them with buttermilk, and fold in those fresh blackberries. Once baked and cooled, wrap each layer tightly in plastic wrap to keep them moist. The frosting can be made up to 3 days ahead as well; just beat the softened butter, add powdered sugar gradually, then incorporate vanilla extract, heavy cream, and orange juice until fluffy. When you’re ready to serve, assemble the cake by layering the cake rounds with frosting in between, and finish by garnishing with extra blackberries and orange slices for a vibrant touch. This way, you save time without compromising on taste!
Your Blackberry Orange Layer Cake Questions, Answered
How can I ensure my Blackberry Orange Layer Cake turns out moist?
To achieve a moist cake, be sure not to overmix the batter once you’ve added the dry ingredients. Mixing until just combined allows the flour to hydrate without developing too much gluten. Additionally, using room temperature ingredients like eggs and buttermilk helps create a smoother batter that incorporates air more easily, leading to a lighter texture.
What should I do if I don’t have buttermilk?
If you find yourself without buttermilk, don’t fret! You can easily make a substitute by mixing 1 cup of milk with 1 tablespoon of white vinegar or lemon juice. Let it sit for about 5-10 minutes until it thickens slightly. This will mimic the acidity of buttermilk and help your cake rise beautifully.
Can I freeze leftovers of this cake?
Absolutely! If you have leftover Blackberry Orange Layer Cake, wrap individual slices tightly in plastic wrap and then place them in an airtight container or freezer bag. They’ll keep well in the freezer for up to three months. When you’re ready to enjoy a slice, simply thaw it in the refrigerator overnight or on the counter for a couple of hours.
What’s the best way to store my finished cake?
For optimal freshness, store your frosted Blackberry Orange Layer Cake in an airtight container at room temperature for up to 3 days. If your kitchen is particularly warm or humid, you might prefer refrigerating it. Just remember to let it come back to room temperature before serving for the best flavor!
Can I use frozen blackberries instead of fresh?
Yes, you can use frozen blackberries if fresh ones aren’t available! Just be sure to gently fold them into the batter without thawing first; this will help prevent them from bleeding too much color into the cake. Keep in mind that frozen berries may release more moisture during baking, so check for doneness a minute or two longer than indicated.
How many servings does this recipe yield?
This delightful layer cake serves about 8 people, making it perfect for family gatherings or special occasions. Each slice is around 450 calories, so it’s just right for treating yourself and sharing some love with others too!
Blackberry Orange Layer Cake
Ingredients
Method
- Preheat the oven to 350°F (175°C). Grease and flour two 9-inch round cake pans.
- In a mixing bowl, cream together the softened butter and granulated sugar until light and fluffy.
- Add the eggs one at a time, beating well after each addition. Stir in the orange zest.
- In another bowl, whisk together the flour, baking powder, baking soda, and salt.
- Gradually add the dry ingredients to the wet mixture, alternating with the buttermilk. Mix until just combined.
- Gently fold in the blackberries.
- Divide the batter evenly between the prepared pans and smooth the tops.
- Bake for 25-30 minutes or until a toothpick inserted into the center comes out clean.
- Allow the cakes to cool in the pans for 10 minutes, then transfer to a cooling rack to cool completely.
- In a mixing bowl, beat the softened butter until creamy.
- Gradually add the powdered sugar, mixing well until combined.
- Add the vanilla extract, heavy cream, and orange juice. Beat until the frosting is light and fluffy.
- Place one layer of the cake on a serving plate. Spread a layer of frosting on top.
- Place the second layer on top and frost the top and sides of the cake.
- Garnish with additional blackberries and orange slices if desired.