
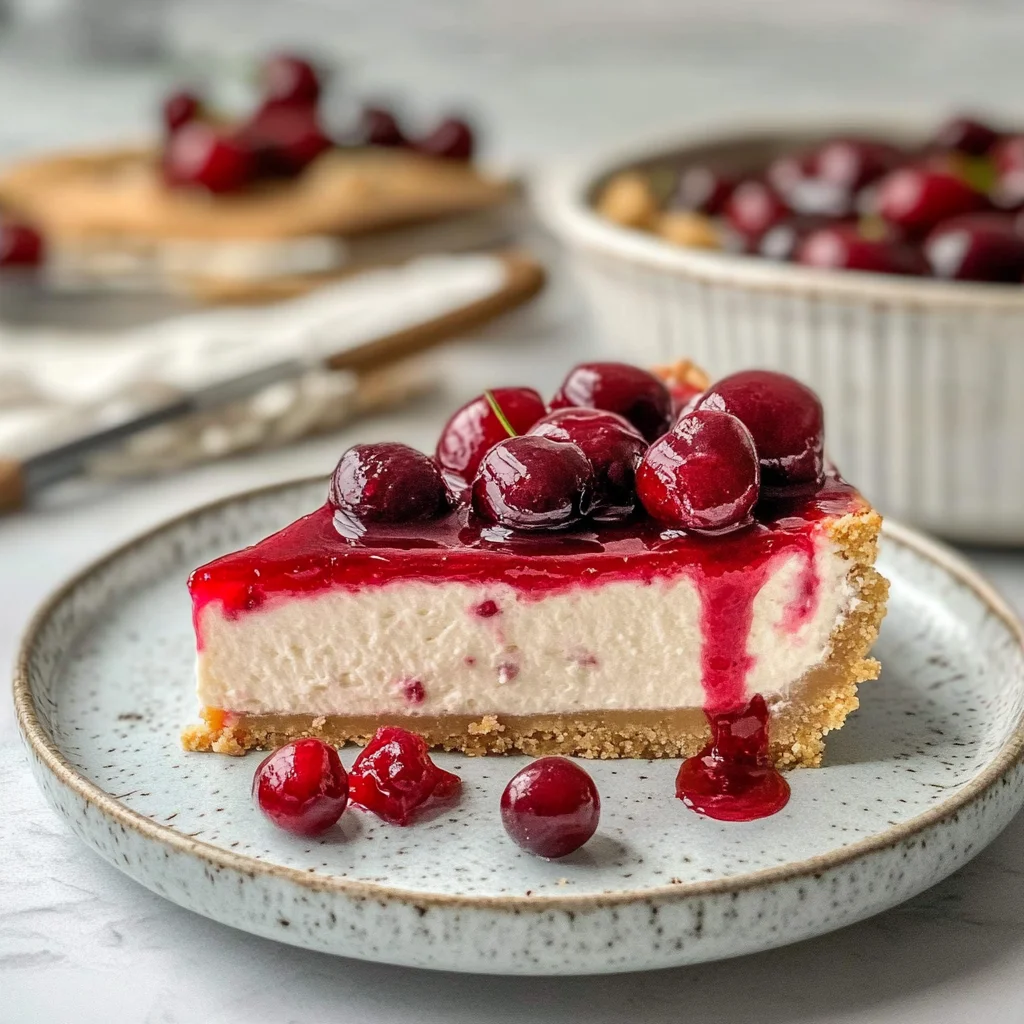
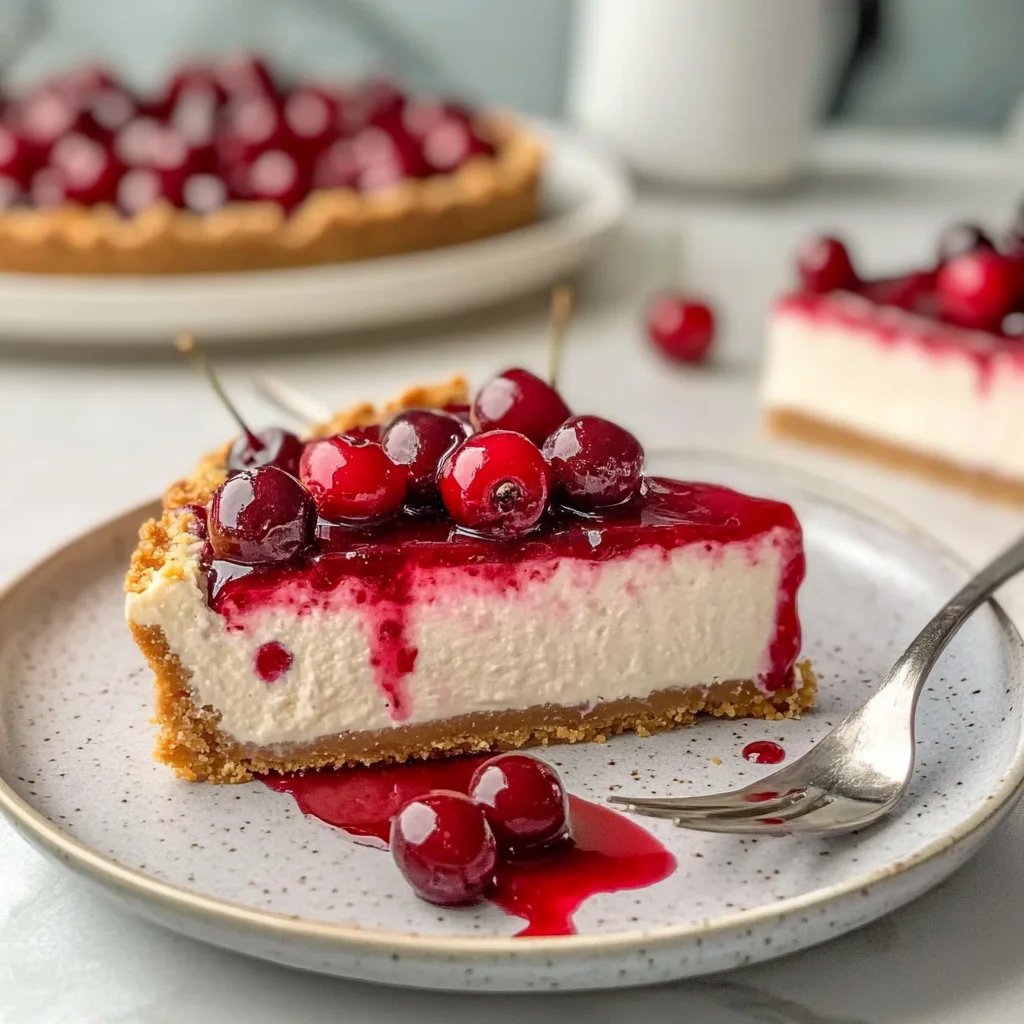
Imagine sinking your spoon into a velvety slice of No-Bake Cherry Cheesecake, where the smooth creaminess dances on your palate, perfectly balanced by the tartness of sun-kissed cherries. The aroma wafts through the air like a warm hug, inviting you to indulge in this delightful treat that embodies summer’s sweetest moments, whether it’s a picnic under the stars or a cozy family gathering.
I remember the first time I made this heavenly dessert; it was a chaotic birthday party filled with laughter and friends, and as I served up each slice, the smiles were worth every minute spent in the kitchen. This No-Bake Cherry Cheesecake is not just a recipe—it’s an experience that promises to make any occasion unforgettable, leaving everyone craving just one more bite of its luscious goodness.
Why Is No-Bake Cherry Cheesecake So Irresistibly Good?
Delightful creaminess awaits with every bite! This cheesecake blends rich cream cheese and fluffy whipped cream, creating a texture that melts in your mouth. Quick and easy to prepare, it requires just 20 minutes of your time, perfect for busy schedules. Versatile enough for any occasion, whether it’s a family gathering or a cozy date night. And let’s not forget the tantalizing cherry topping—its sweet burst of flavor makes this dessert an instant crowd-pleaser!
Ingredients for No-Bake Cherry Cheesecake
For the Crust
- 1 cup graham cracker crumbs – Perfect for creating a crunchy base that complements the creamy filling.
- 1/4 cup granulated sugar – Adds sweetness to the crust, balancing the flavors beautifully.
- 1/2 cup unsalted butter (melted) – Helps bind the crust together while adding rich flavor.
For the Filling
- 16 oz cream cheese (softened) – Provides a smooth and creamy texture essential for the cheesecake.
- 1/2 cup powdered sugar – Sweetens the filling without grittiness, enhancing its silkiness.
- 1 cup heavy cream (whipped) – Lightens the filling, giving it an airy feel that melts in your mouth.
- 1 teaspoon vanilla extract – Infuses warmth and depth, elevating the overall flavor profile of your No-Bake Cherry Cheesecake.
For the Topping
- 1 can cherry pie filling – Offers a burst of sweetness and tartness, making it a delightful finishing touch.
Step-by-Step No-Bake Cherry Cheesecake
1. Combine In a mixing bowl, combine 1 cup of graham cracker crumbs, 1/4 cup of granulated sugar, and 1/2 cup of melted unsalted butter. Mix until well combined for a crumbly yet cohesive texture.
2. Press Firmly press the mixture into the bottom of a 9-inch springform pan. Ensure it’s evenly spread to form a sturdy crust that will hold your delicious filling.
3. Beat In a large mixing bowl, beat together 16 oz of softened cream cheese and 1/2 cup of powdered sugar until the mixture is smooth and creamy, showcasing a lovely pale color.
4. Fold Gently fold in 1 cup of whipped heavy cream and 1 teaspoon of vanilla extract until fully incorporated. This step adds airiness to your filling, making it delightfully light.
5. Spread Evenly spread the cream cheese filling over your prepared crust, smoothing out the top for an inviting presentation that promises creamy goodness in every bite.
6. Refrigerate Cover your cheesecake and refrigerate for at least 4 hours or until set. This chilling time allows flavors to meld beautifully while achieving a sliceable texture.
7. Top Once set, carefully remove the cheesecake from the springform pan and generously top with 1 can of cherry pie filling for that sweet burst of flavor on every slice.
8. Serve Slice your cheesecake and serve chilled to enjoy its rich creaminess complemented by the vibrant cherry topping—an irresistible treat for any occasion!
Optional: Garnish with fresh whipped cream for an extra touch of elegance.
Exact quantities are listed in the recipe card below.
Expert Tips
- Graham Cracker Choice: Use finely crushed graham cracker crumbs for a smoother crust texture, avoiding larger pieces that won’t bind well.
- Butter Measurement: Ensure the melted butter is slightly cooled before mixing; hot butter can affect the creaminess of your filling.
- Softening Cream Cheese: Leave the cream cheese at room temperature for at least an hour to avoid lumps when blending with powdered sugar.
- Whipping Cream Technique: Whip heavy cream until it forms stiff peaks, ensuring your filling is light and airy for the perfect No-Bake Cherry Cheesecake.
- Setting Time: Don’t rush refrigeration! Allowing at least 4 hours helps the cheesecake set properly, preventing a runny texture when sliced.
- Serving Tips: Serve chilled slices of cheesecake immediately after adding cherry pie filling to maintain the vibrant color and taste of the topping.
How to Store and Freeze No-Bake Cherry Cheesecake
- Fridge: Store your No-Bake Cherry Cheesecake in an airtight container for up to 5 days; this keeps it creamy and delicious.
- Freezer: For longer storage, freeze slices wrapped tightly in plastic wrap or foil for up to 3 months. Thaw in the fridge before serving.
- Serving: If you plan to serve leftovers, add fresh cherry pie filling right before enjoying to maintain the cheesecake’s texture and taste.
- Avoid Room Temperature: Keep your cheesecake refrigerated; leaving it out for more than 2 hours may compromise its freshness.
No-Bake Cherry Cheesecake Your Way
Feel free to unleash your creativity and customize this delightful dessert to suit your palate!
- Graham Cracker Substitute: Use crushed vanilla wafers or digestive biscuits for a different flavor profile. The buttery crunch will still provide that satisfying base you crave.
- Chocolate Twist: Replace half of the graham cracker crumbs with cocoa powder for a rich, chocolatey crust. This adds a decadent layer to the cheesecake that pairs beautifully with cherries.
- Nutty Crunch: Incorporate 1/2 cup of finely chopped nuts, like pecans or almonds, into the crust mixture. This will give your cheesecake an appealing crunch and a nutty flavor that complements the creamy filling.
- Coconut Delight: Swap out half of the graham cracker crumbs for sweetened shredded coconut. It brings a tropical flair that harmonizes wonderfully with the cherry topping.
- Spiced Up: Add a teaspoon of cinnamon or nutmeg to the crust for a warm, spiced undertone. This subtle twist can elevate the overall taste and bring comfort to each bite.
- Oreo Base: Use crushed Oreo cookies instead of graham crackers for a chocolatey and indulgent foundation. The creamy filling pairs perfectly with the chocolate cookie crust, making it an irresistible treat.
- Gluten-Free Option: Substitute gluten-free graham cracker crumbs to make this dessert suitable for gluten-sensitive friends and family. The flavors remain intact while accommodating dietary needs.
- Savory Touch: For an unexpected twist, mix in some finely grated Parmesan cheese (about 1/4 cup) into the crust. It creates an intriguing contrast that enhances the sweetness of the cherries on top.
Make Ahead Options
This No-Bake Cherry Cheesecake is an ideal recipe for meal prep, allowing you to enjoy a creamy dessert without the last-minute rush. You can prepare the crust ahead of time by combining 1 cup of graham cracker crumbs, 1/4 cup of granulated sugar, and 1/2 cup of melted unsalted butter, then pressing the mixture into a 9-inch springform pan. The filling can also be made in advance; simply beat together 16 oz of softened cream cheese with 1/2 cup of powdered sugar until smooth, then gently fold in 1 cup of whipped heavy cream and 1 teaspoon of vanilla extract. Once you’ve spread the filling over the crust, cover and refrigerate for at least 4 hours or up to 3 days for optimal flavor. Just before serving, top your cheesecake with a can of cherry pie filling for that sweet finishing touch. With these make-ahead tips, you’ll save time while delivering a delightful dessert that will impress family and friends!
No-Bake Cherry Cheesecake Questions Answered
Can I use a different type of crust for the No-Bake Cherry Cheesecake?
Absolutely! While graham cracker crumbs are a classic choice, you can substitute them with crushed Oreos for a chocolatey twist or even use crushed nuts mixed with butter for a gluten-free option. Just make sure the crust is firm and holds together well when pressed into the pan.
How long can I store leftover No-Bake Cherry Cheesecake?
Your cheesecake will remain fresh in the refrigerator for up to 3 days. Make sure it’s covered tightly with plastic wrap or stored in an airtight container to prevent it from absorbing other flavors in the fridge.
Can I freeze No-Bake Cherry Cheesecake?
Yes, you can freeze your cheesecake for longer storage! Wrap individual slices or the whole cheesecake in plastic wrap and then aluminum foil. It will keep well in the freezer for about 2 months. Just be sure to let it thaw in the refrigerator overnight before serving.
What’s the best way to serve No-Bake Cherry Cheesecake?
For a delightful presentation, slice your cheesecake after topping it with cherry pie filling. Serve it chilled, and consider adding a dollop of whipped cream on each slice for extra creaminess. This will enhance its luscious texture and add a beautiful finishing touch!
Why did my filling not set properly?
If your filling doesn’t set, it could be due to insufficient whipping of the heavy cream—make sure it’s whipped until stiff peaks form. Additionally, ensure that your cream cheese is softened properly; this allows for better incorporation and a smoother mixture. If needed, increase refrigeration time beyond 4 hours until fully set.
Is there a way to make this recipe lower in calories?
Certainly! You could use light cream cheese instead of regular cream cheese and opt for a sugar substitute suitable for baking to cut down on calories. Additionally, using reduced-fat whipped topping instead of heavy cream will help lower the overall calorie count without sacrificing too much on flavor!
No-Bake Cherry Cheesecake
Ingredients
Method
- In a mixing bowl, combine graham cracker crumbs, granulated sugar, and melted butter. Mix until well combined.
- Press the mixture firmly into the bottom of a 9-inch springform pan to form the crust.
- In a large mixing bowl, beat the softened cream cheese and powdered sugar together until smooth.
- Gently fold in the whipped heavy cream and vanilla extract until fully incorporated.
- Spread the cream cheese filling evenly over the prepared crust.
- Cover and refrigerate for at least 4 hours or until set.
- Once set, remove the cheesecake from the springform pan and top with cherry pie filling.
- Slice and serve chilled.