
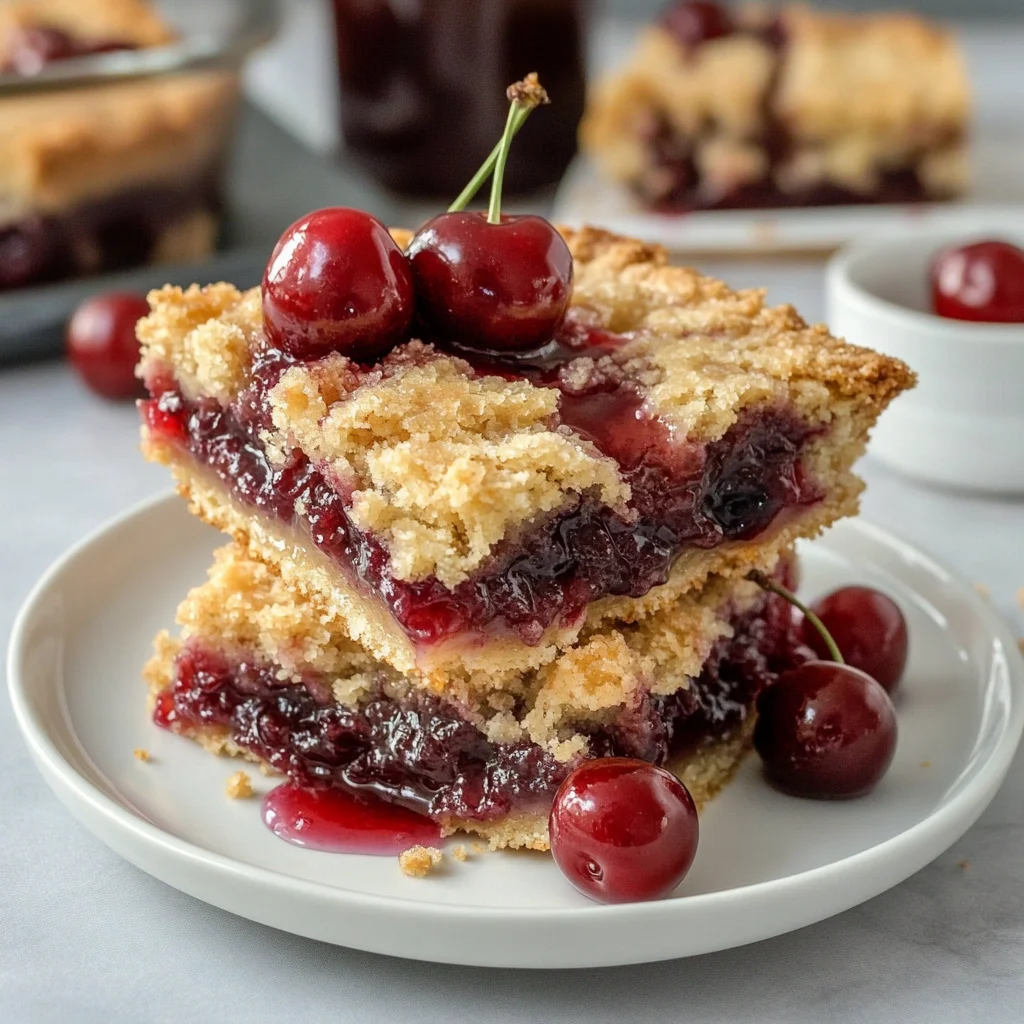
Imagine the aroma of sweet cherries mingling with the warmth of freshly baked biscuits wafting through your kitchen, instantly transporting you to a cozy summer evening. Old Fashioned Cherry Cobbler is more than just a dessert; it’s a delightful experience that evokes laughter, shared stories, and memories of family gatherings where everyone eagerly awaits their slice.
As you scoop into the golden crust, the juicy cherries burst with flavor, creating a delightful contrast that dances on your palate. This cobbler is perfect for any occasion, whether it’s a backyard barbecue or a rainy day indulgence, promising to wrap you in nostalgia while delivering an incredible taste sensation that keeps you coming back for more.
What Makes Old Fashioned Cherry Cobbler So Special?
Delightful flavors of sweet cherries combine perfectly with a buttery biscuit topping, creating a dessert that feels like a warm hug. Quick to prepare, this cobbler takes just 20 minutes of prep time, making it an easy choice for busy weeknights or last-minute gatherings. Versatile enough to use fresh or frozen cherries, it’s a year-round favorite! Crowd-pleasing appeal ensures that everyone will be asking for seconds, while its homemade charm brings back cherished memories of classic family dinners. Irresistibly satisfying, each bite is a delicious reminder of simpler times.
Old Fashioned Cherry Cobbler Ingredients
For the Filling
- 4 cups fresh or frozen cherries (pitted) – Sweet and tart, these cherries form the delightful base of your cobbler.
- 1 cup granulated sugar – Adjust based on the sweetness of your cherries to achieve the perfect balance.
- 2 tablespoons cornstarch – This thickens the filling, giving it a luscious texture.
- 1 teaspoon vanilla extract – Adds a warm, inviting flavor that enhances the cherry taste.
- 1 tablespoon lemon juice – Brightens the flavors and adds a refreshing zing.
For the Topping
- 1 cup all-purpose flour – The foundation of your biscuit topping, creating a deliciously soft layer.
- 1 cup granulated sugar – Sweetens the topping, ensuring every bite is indulgent.
- 2 teaspoons baking powder – Helps the topping rise beautifully while baking.
- 1/2 teaspoon salt – Enhances all the flavors in this comforting dessert.
- 1/2 cup milk (whole or 2%) – Ensures a moist and tender biscuit topping.
- 1/2 cup unsalted butter (melted) – Provides richness and helps create that crispy golden crust.
Directions: Old Fashioned Cherry Cobbler
1. Preheat the oven to 350°F (175°C). In a mixing bowl, combine 4 cups of fresh or frozen pitted cherries, 1 cup of granulated sugar (adjust based on sweetness), 2 tablespoons of cornstarch, 1 teaspoon of vanilla extract, and 1 tablespoon of lemon juice. Stir until well mixed, allowing the flavors to blend beautifully.
2. Pour the cherry mixture into a greased baking dish. Ensure it’s evenly spread for consistent cooking and that every bite is full of delicious cherry goodness.
Make the Topping:
3. Whisk together 1 cup of all-purpose flour, 1 cup of granulated sugar, 2 teaspoons of baking powder, and 1/2 teaspoon of salt in another mixing bowl. This will create a fluffy base that complements the cherry filling perfectly.
4. Add 1/2 cup of milk (whole or 2%) and 1/2 cup of melted unsalted butter to the dry ingredients. Stir until just combined; be gentle to keep that lovely texture!
5. Spoon the topping mixture over the cherry filling, spreading it evenly across the top. This will ensure a delightful biscuit-like crust that turns golden brown as it bakes.
6. Bake in the preheated oven for 30-35 minutes, or until the topping is golden brown and a toothpick inserted comes out clean. Your kitchen will soon be filled with warm, inviting aromas!
7. Let cool for a few minutes before serving. Enjoy warm, optionally with ice cream for an extra indulgent treat.
Optional: Serve with a scoop of vanilla ice cream for a delightful contrast.
Exact quantities are listed in the recipe card below.
Tips for the Best Old Fashioned Cherry Cobbler
- Cherry Selection: Use ripe, sweet cherries for best flavor; adjust sugar if using tart varieties to avoid overly sweet or sour filling.
- Cornstarch Care: Mix cornstarch with sugar before adding to cherries to prevent clumping, ensuring a smooth and thick filling.
- Biscuit Texture: Do not overmix the topping batter; a few lumps are okay. This keeps your topping light and fluffy, perfect for an Old Fashioned Cherry Cobbler.
- Cool Before Serving: Let the cobbler cool slightly after baking. This helps the filling set up, making it easier to serve without running everywhere.
- Optional Ice Cream: Serve warm with a scoop of vanilla ice cream for an extra indulgent treat that complements the cherry flavors perfectly.
How to Store and Freeze Old Fashioned Cherry Cobbler

- Room Temperature: Enjoy your Old Fashioned Cherry Cobbler fresh out of the oven for up to 2 hours. After that, it’s best to refrigerate to maintain quality.
- Fridge: Store leftovers in an airtight container for up to 3 days. Make sure it’s completely cooled before sealing to prevent sogginess.
- Freezer: For longer storage, freeze portions wrapped tightly in plastic wrap and then in aluminum foil for up to 3 months. Thaw in the fridge overnight before reheating.
- Reheating: To reheat, place cobbler in a preheated oven at 350°F (175°C) for 15-20 minutes until warmed through and the topping is crispy again.
Old Fashioned Cherry Cobbler Your Way
Feel free to get creative with this delightful dessert and make it truly yours!
- Berry Medley: Replace cherries with a mix of blueberries, raspberries, and blackberries for a vibrant twist. The combination of berries will add depth and a burst of color to your cobbler, creating a delightful summer dessert that’s perfect for gatherings.
- Almond Extract: Swap vanilla extract for almond extract to impart a lovely nutty flavor. Just a teaspoon will elevate the taste while adding an unexpected layer of richness that pairs beautifully with the sweetness of the cherries.
- Spicy Kick: Add 1/2 teaspoon of cinnamon or nutmeg to the cherry filling for warmth. This subtle spice enhances the overall flavor profile, making each bite feel like a cozy hug on chilly evenings.
- Citrus Zing: Incorporate orange zest along with lemon juice for an extra citrusy brightness. The zest adds aromatic complexity that brightens up the cobbler and complements the sweetness of the cherries wonderfully.
- Oat Topping: Mix in 1/2 cup of rolled oats into the biscuit topping for added texture and chewiness. This hearty addition creates a rustic feel while adding fiber, making your dessert just a bit more wholesome.
- Chocolate Drizzle: After baking, drizzle some melted chocolate over the top for an indulgent finish. This sweet contrast to the tart cherries provides an elegant touch that makes every slice feel like a special occasion.
- Nutty Crunch: Fold in chopped pecans or walnuts into your topping mixture for delightful crunch. The nuts not only bring texture but also introduce rich flavors that complement the fruit perfectly.
- Gluten-Free: Substitute regular flour with a gluten-free blend to cater to dietary needs without sacrificing taste. Your cobbler will still be deliciously satisfying and everyone can enjoy it together!
Make Ahead Options
Preparing Old Fashioned Cherry Cobbler for meal prep is a delightful way to ensure you have a comforting dessert ready to go. You can make the cherry filling, which combines 4 cups of fresh or frozen pitted cherries, 1 cup of granulated sugar, 2 tablespoons of cornstarch, 1 teaspoon of vanilla extract, and 1 tablespoon of lemon juice, up to 24 hours in advance. Simply mix these ingredients together in a bowl and pour them into a greased baking dish. For the topping, whisk together the dry ingredients: 1 cup of all-purpose flour, 1 cup of granulated sugar, 2 teaspoons of baking powder, and 1/2 teaspoon of salt. Then add in 1/2 cup of milk and 1/2 cup of melted unsalted butter. You can prepare this mixture and store it separately in the fridge for up to 3 days. When you’re ready to serve, simply combine the filling and topping and bake as directed for that warm, homemade goodness that everyone loves. Enjoy your Old Fashioned Cherry Cobbler with a scoop of ice cream for an extra special treat!
Old Fashioned Cherry Cobbler Recipe FAQs
What type of cherries are best for this cobbler?
Fresh, sweet cherries are ideal for this recipe; however, frozen cherries can also work beautifully. If using frozen, there’s no need to thaw them first; just add a few extra minutes to the baking time.
Can I reduce the sugar in the filling?
Absolutely! The amount of sugar can be adjusted based on the sweetness of your cherries. If you’re using particularly sweet varieties, try starting with 3/4 cup and taste-testing before adding more.
How should I store leftover cherry cobbler?
If you have any leftovers (which is rare!), let the cobbler cool completely, then cover it tightly with plastic wrap or aluminum foil. It can be stored in the refrigerator for up to 3 days. Just reheat it gently in the oven before serving!
Can I freeze my cherry cobbler?
Yes! To freeze, allow the cobbler to cool completely, then wrap it tightly with plastic wrap and aluminum foil. It can be stored in the freezer for up to 2 months. When you’re ready to enjoy it, thaw overnight in the fridge and reheat in a 350°F (175°C) oven until warmed through.
What if my topping isn’t baking properly?
If your topping isn’t browning after 30 minutes, make sure your oven is fully preheated to 350°F (175°C). You can also check with a toothpick; if it comes out clean from the topping but not golden yet, you might want to broil it for a minute or two—just keep a close eye on it!
Is there a dairy-free option for the topping?
Yes! You can substitute the milk with an unsweetened plant-based milk such as almond or oat milk. For butter, use a dairy-free alternative like coconut oil or vegan butter. This way, everyone can enjoy this delicious dessert!