
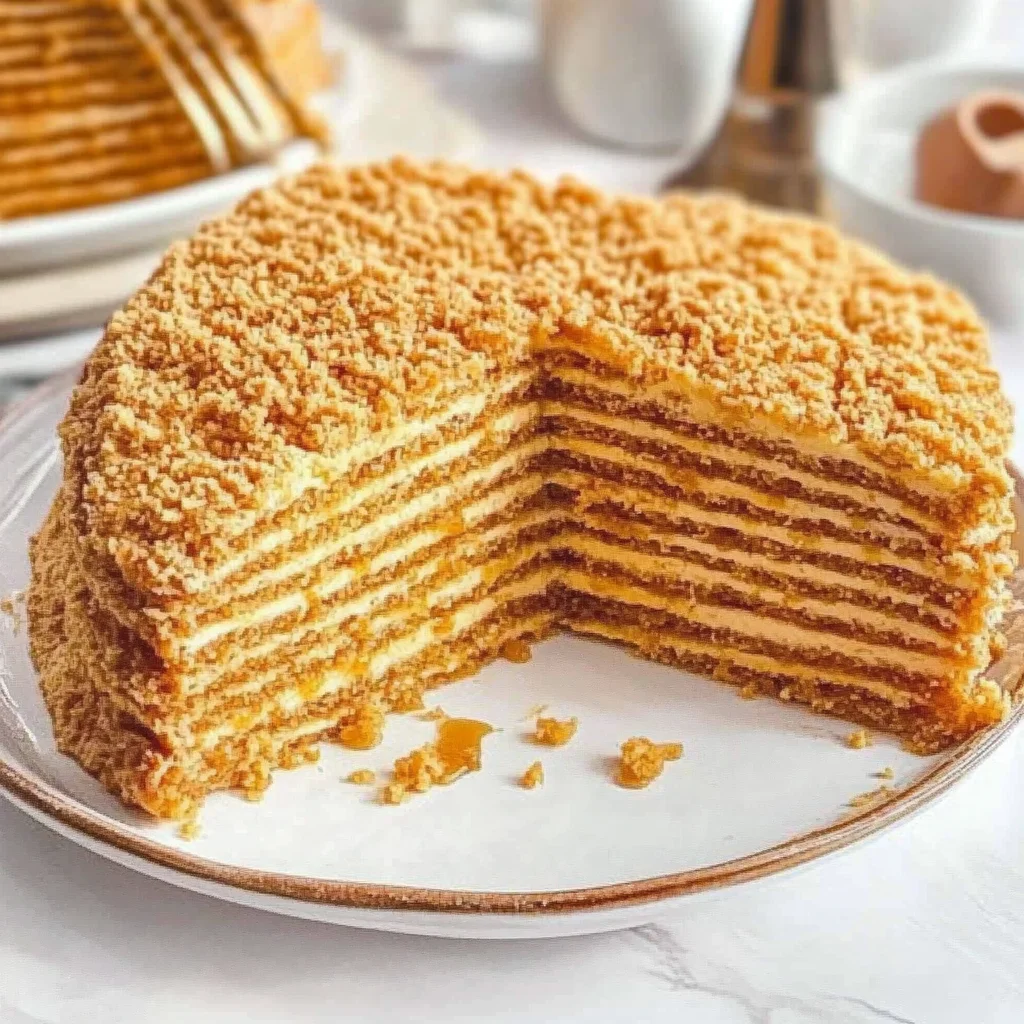
Imagine sinking your fork into the delicate layers of a Russian Honey Cake, where the sweet aroma of honey mingles with the rich buttery flavor, creating an irresistible symphony for your senses. Each bite reveals a delightful combination of creamy sour cream and honey-soaked cake that transports you to a cozy kitchen filled with laughter, warmth, and cherished memories.
Growing up, I remember my grandmother whipping up this masterpiece for every holiday gathering, her laughter echoing as we eagerly awaited a slice. Whether it’s a birthday celebration or a casual afternoon tea, this cake is the ultimate indulgence that promises to bring joy and nostalgia in every crumb, making it an unforgettable treat for any occasion.
Why Is Russian Honey Cake So Irresistibly Good?
Indulge in the rich, buttery flavor that makes each slice a delight!
Honey adds a natural sweetness, balancing perfectly with the tangy sour cream frosting.
Versatile enough for any occasion, it impresses at birthdays, holidays, or simple gatherings.
Easy to make, this layered cake requires just 30 minutes of prep and is sure to wow your guests.
Crowd-pleaser, you’ll find everyone reaching for seconds as its unique flavors shine through!
Russian Honey Cake Ingredients
- For the Cake Layers
- 3 cups all-purpose flour – This provides the structure for your Russian Honey Cake, giving it that delightful texture.
- 1 cup honey – Adds natural sweetness and a rich flavor profile that is essential to this traditional cake.
- 1 cup sugar – Enhances the sweetness and balances the earthiness of the honey in each layer.
- 1 cup butter (softened) – Ensures a moist, buttery richness that elevates the overall flavor of your cake.
- 4 large eggs – Binds the ingredients together while adding moisture and richness to the cake layers.
- 1 teaspoon baking soda – Helps the cake rise beautifully, creating light and airy layers.
- 1 teaspoon vanilla extract – Infuses a warm, comforting aroma that complements the honey perfectly.
- 1 pinch salt – Balances out the sweetness and enhances all the flavors in your cake.
- For the Frosting
- 2 cups sour cream – Provides a creamy, tangy contrast that pairs wonderfully with the sweetness of the cake layers.
- 1 cup powdered sugar – Sweetens the frosting while ensuring a smooth, spreadable consistency for perfect layering.
- 1 teaspoon vanilla extract – Adds depth to the frosting, enhancing its flavor in harmony with the Russian Honey Cake.
Step-by-Step Russian Honey Cake
1. Preheat the oven to 350°F (175°C) and line baking sheets with parchment paper to ensure your cake layers bake evenly without sticking.
2. Cream together the softened butter and sugar in a mixing bowl until light and fluffy, about 3-5 minutes; this will help create a delightful texture.
3. Add the honey and mix well, then incorporate the eggs one at a time, ensuring each is fully blended before adding the next for a smooth batter.
4. Combine the flour, baking soda, and salt in a separate bowl; gradually add this dry mixture to the honey mixture, mixing until just combined—don’t overmix!
5. Divide the batter into equal portions and spread each onto the prepared baking sheets, making sure they are evenly distributed for uniform layers.
6. Bake for 10-12 minutes or until golden brown; keep an eye on them—the aroma will be heavenly! Allow to cool completely on a wire rack.
Prepare the Frosting:
7. Mix together the sour cream, powdered sugar, and vanilla extract in a bowl until smooth; this creamy frosting will beautifully complement your cake layers.
Assemble the Cake:
8. Spread a layer of frosting on top of one cooled cake layer, making it invitingly thick to enhance that rich flavor.
9. Stack another layer on top and repeat the process until all layers are stacked high—this is where your cake starts to take shape!
10. Frost the top and sides of the assembled cake with any remaining frosting, smoothing it out for that perfect finish.
11. Chill in the refrigerator for at least 2 hours before serving to allow those flavors to meld beautifully together.
Optional: Garnish with crushed nuts or fresh berries for an extra touch of flavor!
Exact quantities are listed in the recipe card below.
Expert Tips
- Room Temperature Ingredients: Ensure your butter and eggs are at room temperature for easier mixing and a smoother batter.
- Watch the Baking Time: Keep an eye on the cake layers as they bake; overbaking can lead to dryness. Aim for a golden brown color.
- Even Layering: Use a kitchen scale to divide the batter evenly among baking sheets, ensuring uniform layers for a balanced cake.
- Cooling the Layers: Allow the cake layers to cool completely before frosting. This prevents the frosting from melting and sliding off.
- Chill Before Serving: For best flavor and texture, let your Russian Honey Cake chill in the refrigerator for at least two hours before serving.
How to Store and Freeze Russian Honey Cake
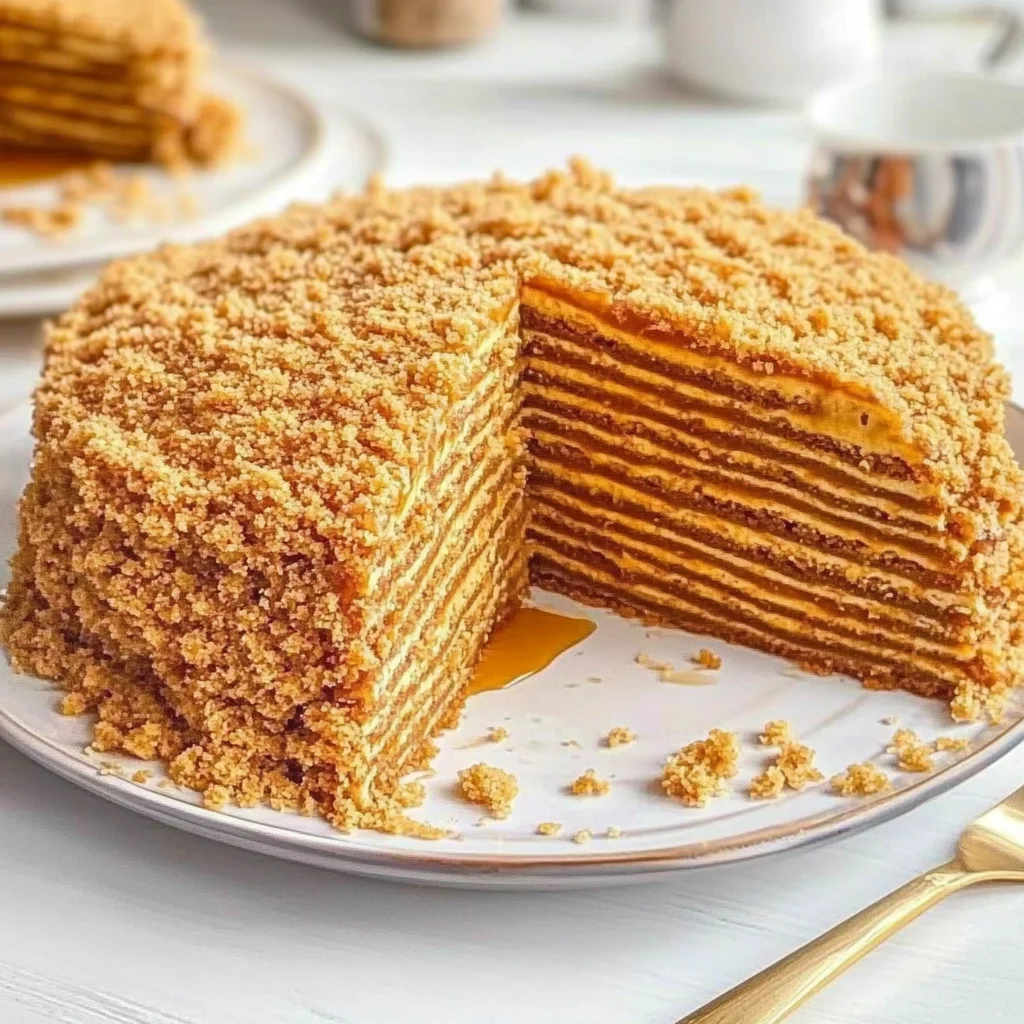
Room Temperature: Enjoy your Russian Honey Cake fresh for up to 3 days. Keep it covered in an airtight container to maintain its moist texture.
Fridge: For longer freshness, store the cake in the refrigerator for up to a week. Wrap each layer individually in plastic wrap before placing them in an airtight container.
Freezer: If you want to save some cake for later, freeze it for up to 3 months. Make sure each layer is wrapped tightly in plastic wrap, then place in a freezer-safe bag.
Reheating: To enjoy your frozen Russian Honey Cake, thaw it overnight in the fridge and bring it to room temperature before serving.
Russian Honey Cake Your Way
Feel free to explore your creativity and personalize this delightful treat with these fun variations!
- Whole Wheat: Substitute half of the all-purpose flour with whole wheat flour for a nuttier flavor and added nutrition. The earthy taste pairs beautifully with the sweetness of honey, giving your cake a wholesome twist.
- Maple Syrup: Instead of honey, use 1 cup of maple syrup for a unique flavor profile. This subtly sweet swap will lend a delightful touch of warmth and depth to your cake.
- Brown Sugar: Replace granulated sugar with brown sugar for a richer, caramel-like flavor. This change not only enhances the taste but also adds moisture, making your cake irresistibly tender.
- Coconut Oil: Swap butter for coconut oil to create a dairy-free version while infusing a hint of tropical flavor. This will bring an exotic flair to each bite, perfect for those who prefer lighter options.
- Lemon Zest: Add 1 tablespoon of lemon zest to the batter for a refreshing citrus note. The bright flavor will balance the richness of the honey and butter, creating a harmonious blend.
- Almond Extract: Substitute vanilla extract with almond extract for an aromatic twist. This small change can transform your cake into something truly special, offering a fragrant surprise with every slice.
- Chopped Nuts: Fold in 1 cup of finely chopped walnuts or hazelnuts into the batter for added crunch and texture. The nuts will complement the soft layers beautifully, adding an enjoyable contrast with each bite.
- Spicy Kick: For those who enjoy heat, add 1/2 teaspoon of ground cinnamon or ginger to the batter. These warming spices will create an inviting bouquet that enhances the overall experience of this traditional dessert.
Make Ahead Options
One of the best things about this Russian Honey Cake is that it lends itself beautifully to meal prep, making it an ideal choice for special occasions. You can prepare the cake layers up to 24 hours in advance by mixing together 3 cups of all-purpose flour, 1 cup of honey, 1 cup of sugar, and the rest of your ingredients as outlined in the instructions. After baking and cooling them completely, simply store the layers in an airtight container at room temperature. The frosting, made with 2 cups of sour cream and 1 cup of powdered sugar, can also be prepared a day ahead and kept in the refrigerator. When you’re ready to serve, just assemble the cake by layering the frosting between each cooled cake layer and chilling it for at least 2 hours to ensure everything melds together beautifully. This way, you save precious time while still delivering a stunning dessert!
Russian Honey Cake Recipe FAQs
What type of flour should I use for this cake?
For this Russian Honey Cake, all-purpose flour works best. It provides the right structure and texture to the layers, ensuring they are sturdy yet tender. If you’re looking for a gluten-free option, you might experiment with a 1: 1 gluten-free flour blend, but the results may vary.
How can I ensure my cake layers bake evenly?
To achieve even baking, be sure to spread the batter evenly on your prepared baking sheets. Keep an eye on them in the oven; they typically take about 10-12 minutes at 350°F (175°C). Look for a golden-brown color around the edges as a sign they’re ready. If you notice uneven browning, try rotating your baking sheets halfway through.
Can I make this cake ahead of time?
Absolutely! You can bake the layers and prepare the frosting up to 2 days in advance. Store the cooled cake layers in an airtight container at room temperature or refrigerate them if your home is warm. Just remember to frost it shortly before serving so it stays fresh and delicious!
What’s the best way to store leftovers?
Leftover Russian Honey Cake can be stored in the refrigerator for up to 5 days. Just make sure to cover it tightly with plastic wrap or place it in an airtight container to keep it moist. The flavors often deepen after a day in the fridge, making it even more delightful!
Can I freeze this cake?
Yes, you can freeze Russian Honey Cake! To do so, wrap each layer tightly in plastic wrap followed by aluminum foil. This prevents freezer burn and keeps them fresh for up to 3 months. When you’re ready to enjoy it, simply thaw overnight in the refrigerator before assembling and frosting.
What if my frosting is too runny?
If your sour cream frosting turns out too runny, try adding more powdered sugar—start with a tablespoon at a time until you reach your desired consistency. Ensure that your sour cream is thick; if it’s too watery initially, consider draining it through a fine mesh sieve before mixing for better results!